Welcome to Falcondude.com! |
|---|
This site is dedicated to my 1963 Falcon Futura, which I rescued from the scrap pile starting in 1997. Not sure I'd do it again but I did it just to prove it could be done. The car was in North Carolina and it took me a full day to drive my 1979 Ford E150 van from northern Virginia to pick up the car with a tow dolly. It had a 6 cylinder motor C4 transmission and a $650 price tag. The straight 6 engine was too tall for the hood to close. It looked like someone put in the motor then got mad because the hood would not close, so they gave up on the project. The seller was a Falcon guy and had taken many parts off the car. It had no paint, no window glass and no interior. It had been sitting in a pole barn and one side was exposed to the elements (rust). Since he was a collector (of sorts) he had thrown many Falcon parts inside the car. Leaves had piled up inside and covered up many of the treasures. I think he was surprised I bought it!
The next day was spent sizing up the new addition and removing trash from the interior. Trying to decide which parts needed to be kept and thrown away was also a project. Since I never owned a Falcon before it took several days of internet searching just to find which parts fit which cars. The collection was one of these, two of those, and many parts that did not fit the car. I started swapping and found many nice parts via eBay.
I thought a long time about a multicarb 6 cylinder drive train setup but ended up going with a 289. The engine was not running but was complete and delivered for $300. The rebuild project was started. It took a full 3 years of working nights and weekends to get the car on the road. Several eBay buys and swap meet trips yielded many driver quality parts. I was stupid enough to pay a vendor in Carlisle for the rear window glass in advance! A surprise visit to his out of state business location got me a refund.
|
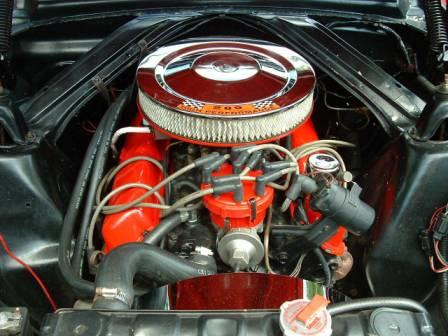
The 1965 289 was from a Comet Calente and was run out of oil by the previous owner so the drive shaft between the distributor and the oil pump looked like a pretzel. Rebuilding the engine was fun the first time around. I decided to say 'period correct' with the project and use 60's style parts when ever possible, but could not bring myself to use the points style ignition system. The coil and ignition box lived in a full size 80's Mercury from the junkyard. A real nice 65 Autolite 4100 and a stock 4 barrel manifold arrived from an eBay seller. The red valve covers and distributor cap were painted to match the car. |
|---|
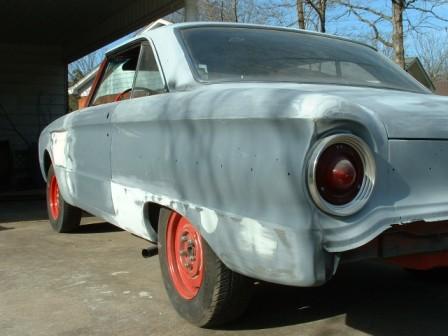
Restoration for the body was done in my driveway outside. The car must have been stuck in the mud before they parked it. Cleaning the bottom was very much a challenge, but could have been worse since the shell had no drive train and interior. I also purchased a few scrap Falcon cars and used parts where I could, then sold the pieces I couldn't use to help finance the project. In 2000 the shell was ready for paint. Because I was broke a cheapie $500 Macco paint job was all I could afford (more on this later). I did my best with bondo and sandpaper, no power tools to get the car in primer. In retrospect I'm surprised it looked as nice as it did.
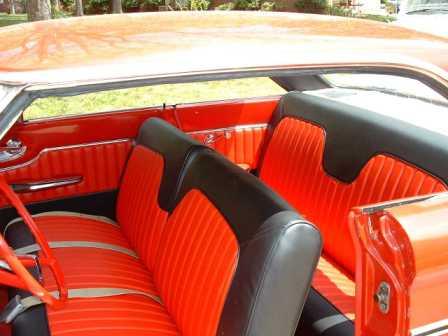 |
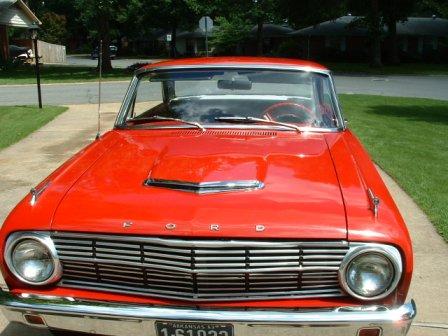
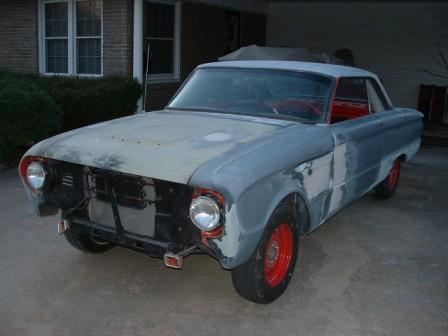
In 2001 the car (and me) moved south to Little Rock, AR. It won a 'Diamond in the rough' award and was driven around the Dallas motor speedway at a regional FCA meet. The bumpers were re chromed along with the hood scoop Sold my 1977 Corvette and used some of the money for a new interior. Now I had door panels! Wow, we are cool now. Here is a picture of the car in 2006 from it's best angle.
|
 |
|---|
Disaster hit after driving home from the Nashville Falcon Club meet. No AC and 100 degree temperatures. A rocker arm had tilted sideways and caused a pushrod to bend. Click click click....
I'm a do-it-yourselfer and had rebuilt a few engine, the idea of paying someone to fix it was out of the question. I spent many days and nights trying to figure out just how the rocker arm would (and was able to) tilt sideways. Of course the affected cylinder was all the way in the back of the engine on the driver's side - the least accessible. The heads were pulled and taken to a local machine shop. After a few days the machine shop called and could find nothing wrong with the heads. New push rods and a new rocker arm were on the way. A few weekends later the heads were back on the car with the same problem! Again I took the heads off and made the machine shop trip. As before, no problem was found. It's easy to learn about the cost of head gaskets after doing this twice, but the fun was not over. Third time's a charm. This time I pulled the heads and went to another machine shop that showed me the groves in the pushrod guide holes on more than a few cylinders. He did the job right and I sprung for (pardon the word) Chevy high performance valves and roller tip rockers. Problem solved.
I found an 8" rear from a 65 wagon in Florida. Experimenting with ratios was just part of the fun. A 3.55:1 gear was lots of fun but did not work well on the highway. After a little work a 3.25 gear is in the car. Summers in the south were not kind to the stock Ford V8 radiator. A friend helped me make brackets for a Speedway generic cross flow model. The only way to go and what a difference!
| The interior is looking good! Notice the junkyard radio. A previous owner has cut the dash to make the hole bigger. It took a long time before I had the confidence to fix it. Believe it or not I purchased a dash on eBay and cutout the metal around the radio and used PC7 to glue it in place. It sports an aftermarket (made for Falcon) radio now and only I know where the sanding and filling was done! | 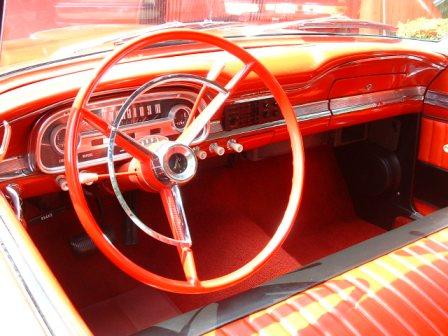 |
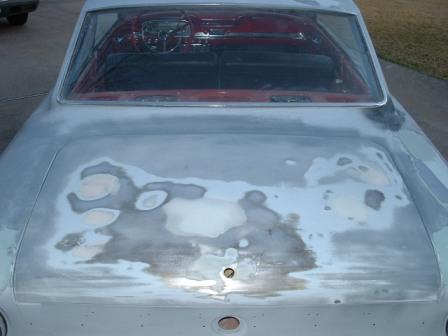
The body shop class is just getting started and it took 6 full days to strip the red paint! Now I know why it costs so much to paint a car! Rust around the rear wheels means new panels are going on. |  |
|---|
Well it's 2007 and the Macco paint job is starting to show it's age. One of the most frustrating things is the water spotting that happens almost every time the car is washed. Since I did not pay for clear coat the only way to make the car look good again is to compound and wax each time. Half a day's work and I'm not getting any younger. A friend told me about a "paint your car" class at the local college. 10 Saturdays starting next week. Body work was something I really never tried much so I decided to sign up.
 |
Inside the hood was rusty so it was covered with POR-15 and tye coat primer. Looks nice! |  |
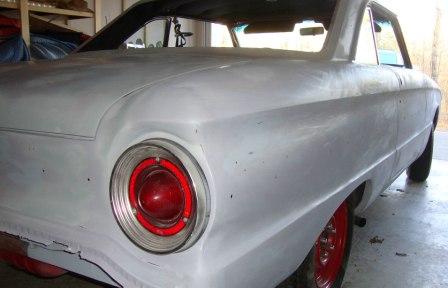
3M panel body epoxy was used to stick new panels on each side. They are sold in 2 pieces for each side. Mine came from Mac's. The plan is to only use what you need so many cut and fit sessions are required. My first time welding is right above the rear wheel centerline. Screws hold the panels in place until the glue sets. The wheels were from a Dodge pickup and were given to me from a friend. |
|---|
| A previous owner has replaced the driver's side floor with a flat piece of sheet metal. It looks ok but was just pop riveted in place. I'm afraid it will also need to be fixed. Now that I'm looking at the body work closer I can see why the floor was replaced. Here's a view from the bottom of the car looking up towards the left front torque box. yummy! |  |
A & M Auto Dismantling in Sacramento, CA fixed me up with a used torque box from a junk Falcon. It took a few hours of cutting and several cutting wheels but the part looks great! I coated the inside with POR-15 and have my car trimmed up for welding. The paint your car class starts again in 2 weeks. |
|---|
 |
 |
 |
 |
|---|
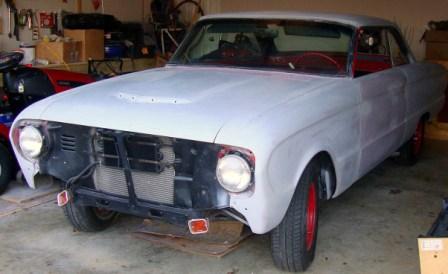
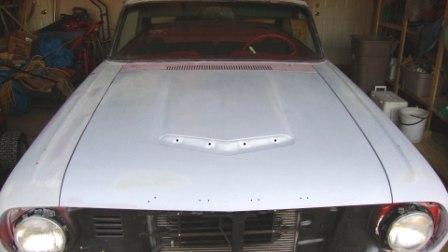
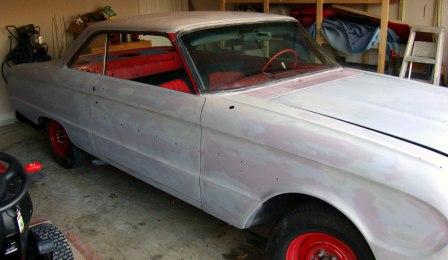
It is now 2010 and the weekend body shop class was cancelled last year. A new house move got me a small garage. I borrowed a spray gun and primed the car twice. The red tint is a touch of rangoon red added to the primer. Not sure if it helped. I switched back to grey primer on the last panels. I've gone around the entire car with 400 grit sandpaper and washed it for the first time in a long time. I am out of string - After some thought the plan is to pay a professional to finish the car. The first shop owner who saw the car laughed at me and told me they have no interest in painting the car. I understand the thinking. It took a few more months and talking with other car guys until I found the right shop. My Christmas and birthday present is to get the car painted. My fingers are crossed.
 |
 |
 |
 |
|---|
| It's now March 2010. The Falcon is red again! Thanks to Steve at SRW Body Works in Little Rock the car looks great. The paint is the original Rangoon Red. Two coats then the third coat is 50/50 clear and the last on is 75% clear 25% paint. Steve says it looks better than most. |
|---|